Categories
Beauty

Smoke ’em out!

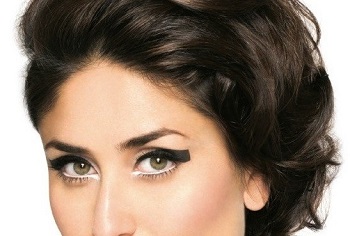
Sexy, dramatic and smouldering – a smokey eye lifts your look like nothing else. Here’s how you get it done.
by Ankita Pathak

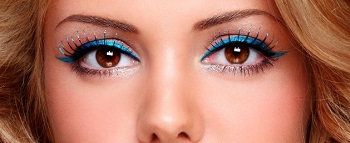
There’s nothing quite like a pair of smokey eyes staring at you. Smokey eyes are sexy, dramatic and smoldering, and instantly lift your look. When it comes to learning a new eye makeup technique, learning how to do a smokey eye should be the very first thing a woman should make a beeline for.

The smokey eye look isn’t limited only to runways, the red carpet, or black tie events. With many colour variations and options available, many women are deciding to wear this sultry look more often. But to learn how to do it, you’ll have to go back to the basics.

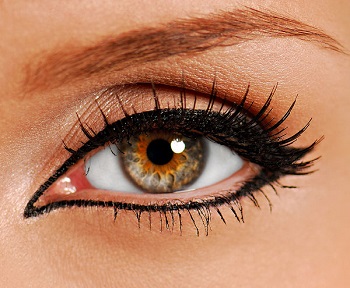
And all you really need is a classic kohl pencil. Because you can actually create a full smokey eye by smearing and blending your liner up and out. That’s it! You can do it with any colour, as long as it’s a classic kohl pencil. You will instantly love this look because it gives your eyelid more of a ‘watercolour’ finish that you can’t get with eyeshadow.
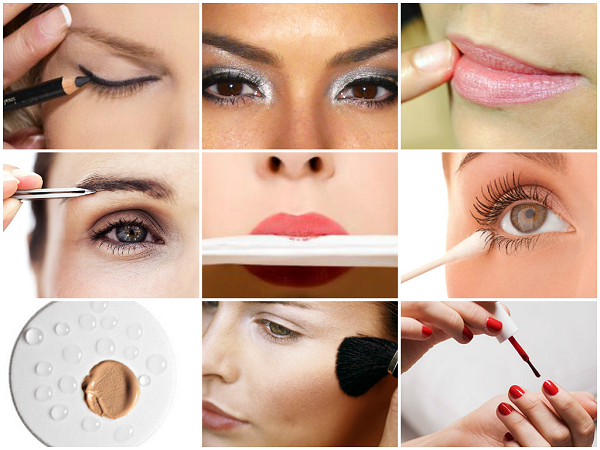
kohl pencilTools of the trade:

Kohl pencil — almost every brand offers a kohl version, and most offer it in many colours.
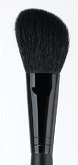
– Blending brush

– Mascara

– Setting powder — you can use the same powder you set your face makeup with, just make sure it’s translucent.
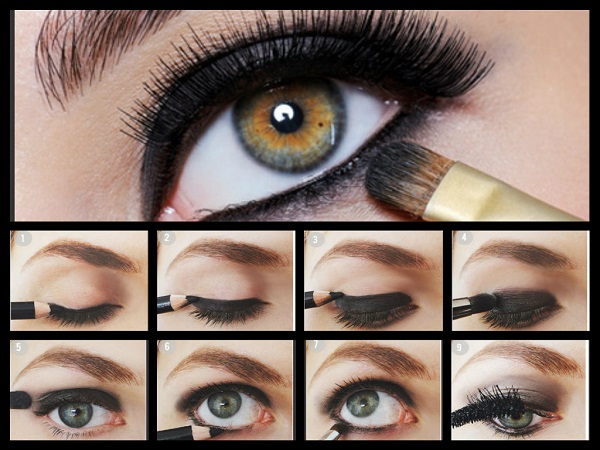
Steps to follow:

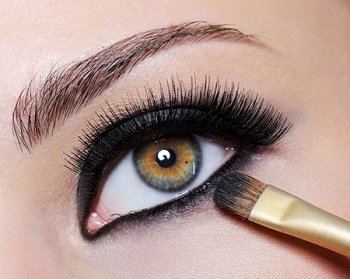
– Line your upper lashline from the inner corner to the outer corner.

– Draw another line directly above that one.

– Keep drawing lines above each other until you reach the crease.

– Blend back and forth with the blending brush over the area you’ve filled in. You can also use your finger, but it’s a little messier!

– Trace the lower lashline with the same kohl pencil.

– Smudge the line back and forth with the Q-tip using short strokes to really work it into the lashline.

– Finish with a couple coats of mascara.

– Set it with a quick dusting of translucent setting powder.blending brush

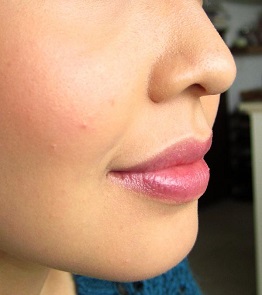
Pair your look with a pink-nude cheek and lip and voila! You now have yourself a makeup job that took a matter of minutes and a few simple tools. Of course, practice makes perfect so for all of you makeup novices out there – try this look out on an off day to be sure your results are just as stunning as those gracing the runways in Milan.

Categories
Beauty

Make your own beauty products

Did you know that you can make body scrubs, lip balms, and even hair spray at home? We explain how.
by Ankita Pathak

You need a variety of cosmetics for several needs, but what you probably didn’t know is that you can make most products at home! From hair and skin treatments to makeup, perfume, teeth and nail whitening – there are so many great products to make and use!  And who says you need to spend a lot?  Some of the ingredients you need may already be lying around your house. So let’s get started on making your own beauty stash!

Tinted lip balmTinted Lip Balm

You will need:

Blob of lipstick

Vitamin E capsule

½ tsp Vaseline

¼ tsp glycerin

Essential oils

Empty syringe

1 empty pot container

In a bowl, place Vaseline, Vitamin E, glycerin and lipstick on a double boiler to blend. After the mixture melts together, remove from heat and add a drop of your favorite essential oil to it. Fill your lip pot with the ready mixture using the disposable syringe. Voila! You have your very own lip stain!

Lip and body scrub

You will need:

2 tbsp sugar

1 tbsp oats and chocolate powderbody scrub

2 tbsp olive oil and honey

1 empty jar

Take a glass jar and start by mixing the oats, honey and chocolate powder. Oats act as an exfoliant and honey helps in moisturising. Add sugar and olive oil to soak all the ingredients and let the mixture sit for two hours. Use the scrub mixture on lips and body to remove any dead skin.

Eye makeup remover

You will need: 2 tbsp white mustard oil or 1 tbsp extra virgin olive oil.

Dab a cotton ball into the oil to remove eye make-up and waterproof mascara. Rinse face with cold water. This homemade eye makeup remover will work in a pinch if you run out of your normal brand. It’s also a great way to save money instead of using expensive makeup removers.

Eyeshadow primer

Eyeshadow primerYou will need:

½ tsp natural chap stick

1 tsp cornstarch

1 ½ tsp liquid foundation

Container

Get a clean container or use a sample jar but you could also use an old eye shadow pot. Run the chap stick under warm water for a minute before you add it to the mixture. Put all the ingredients in container and mix well. Use the primer as an eye shadow base to make your eye make-up last longer.

Hairspray

You will need:

1 lemon

300 ml water

2 tbsp vodka

Place the lemon (chopped into pieces) into a saucepan with the water. Bring it to a boil, then cover and simmer until the lemon softens. Strain and then leave to sit until it’s completely cooled. Transfer the liquid into a sterilised spray bottle. Next, add the vodka then give it a quick shake.

Glitter nail polish    Glitter nail polish

You will need:

Transparent nail paint

Paper cone/ funnel

Glitter powder of your choice

Start by emptying a small amount of the clear polish in to the garbage, you will need space for the glitter.  Pour a small amount of glitter at a time with the help of a paper funnel, keep pouring until you achieve the glittered look you want.  Once you’ve put all the glitter in the bottle, shake it vigorously to get the glitter and polish to mix.

Blackhead removal solution

You will need:

1 lemon

1 tbsp honey

Rub the lemon dipped in honey on face, emphasise the black heads prone areas like nose, chin etc. Leave the lemon and honey mixture on your face for about five minutes, then wash it with cold water. You will see the results immediately. Additionally, lemon juice will also fade other marks/spots on the face and honey will moisturise.

Tan remover

You will need:

1 tomato

Sugar

Buttermilk

Apply squashed tomato juice with 6 spoons of buttermilk and sugar on the sunburn affected areas to cure them quickly. Tomato helps in lightening skin and buttermilk helps in moisturising. Do this repeatedly for a week and notice the difference.

Have you made any beauty products at home? Tell us about them in the comments section below.

(Pictures courtesy talkingpretty.com, makeup.me.uk, www.fashiondivadesign.com, www.fashionncare.com)

Categories
Beauty

Blow drying your hair made easy

Have 15 minutes to spare, washed hair and a blow dryer? Read on to know how to blow-dry your hair.
by Ankita Pathak

How is it you never really look as put together as you do when you leave the salon after a professional blow dry? Is there magic to hair care and achieving the perfect blow dry or is it possible to do it yourself? Actually, it is quite possible, as long as you follow the right steps!

Getting a professional blow dry is like getting a shot of beauty adrenaline. The feeling you experience when you leave the salon is pure exhilaration. Nothing much has changed; your face is the same, and your weight is the same, but somehow you feel ten times more beautiful and infinitely more confident.

If you need help in the blow drying department, here’s what you need:

Time required: 15 to 30 minutes, depending on length and thickness of hair.

Tools: In order to achieve a salon quality blow out, you’ll need to add certain tools to your arsenal, such as a blow dryer, brush and serum. Go with a round hair brush with a barrel anywhere from 1 ¾ to 2 ½ inches.

– Pre-dry prep: Start with freshly-washed hair. If you have dry hair, condition in the shower. If you have fine hair, condition only the ends. Blot hair – never rub – with a towel to get rid of excess moisture. You can’t do a blow dry with really wet hair or it will take forever. If softness and shine is what your hair needs to remove the excess knots, use a dime-sized dollop of hair serum evenly through strands.

divide and clip– Divide and clip: Divide and clip your hair into two sections – top and bottom. To make it easier, draw a line with your index finger from above your ears. Right where your fingers meet becomes your top section. If you have bangs, leave them loose. Dry your bangs into place first to set them so they aren’t harder to tame at the end.

– Nozzle magic: Put the nozzle of your dryer and, beginning with the bottom section, wrap a 2- to 4-inch section of hair around a round brush and pull as taut as you can. Keeping the hair taut is 50 percent of the battle. Ensure that your dryer nozzle is pointing down the hair from roots to ends. This will also help with frizz.

Continue through the top section until hair is dry. Finish off with a serum to weigh down random frizzy parts. Crucial points to note: do not apply nozzle use in blow dryingtoo much product. Gunking up your hair won’t help you get the style you crave; it will only weigh it down and prevent it from cooperating. Also, don’t dry hair that’s too wet. Your hair will take much longer to dry and be unnecessarily exposed to more heat. Lastly don’t over-dry your hair to a level where you can smell burnt hair. It’s a common mistake that can damage your strands. For volume on the top, hold the dryer under the brush and pull it down. Finally flip your hair upside down and shake it up!

Did you find these tips useful? Tell us about your blow drying adventures in the comments section below.

Categories
Uncategorized

What your eyeliner says about you

Your eyeliner says a lot about you, even more than you realise. So how do your eyes do the talking?
by Ankita Pathak

Bold red lips, pastel eye shadow, bronzed skin…your makeup reveals a lot about your personality. Your eyes are the windows to your soul, letting the world know how you feel with just your eye makeup. Are you simple, sexy, bold, fearless or trendy? Find out what your eyeliner personality is:

coloured eyelinerColoured eyeliner

If colored eyeliner is a staple in your look, you’re likely your friends’ go-to person when it comes to makeup. You’re not afraid to take risks and be brave; you’re always ready for the next challenge in your life. You love finding inspiration all around you and you’re totally in-sync with what’s trending.

Glitter or shimmer eyeliner

A safer bet: shimmer. Wearing it the right way (see featured image above) shows that you’re proud of your best features and you know how to enhance them. Keep in mind it’s an actual skill to be able to pull off a look like this. And if you do it right, it’s a hint that you ‘know your assets’; it means you’re spontaneous, and love having fun with your looks.

Smokey eyelinersmokey eye

You skate on the edge of rebellion and drama. One look from you melts anyone within a 30-feet radius. The total mastery of knowing when to turn it on and off is only natural for you—it takes extreme control to blend your liner and shadow so well. You are not afraid to be bold and sassy and know that your eyes are your best feature! You’re fun, popular and experimental and like to up the glamour quotient with just your eyes!

60’s Goddess

You are the glamorous fashionista who loves to put her own twist on things. Slightly off-beat, gorgeously eye-enhancing, but not too much to take away from your outfit, a winged tip is one of the most versatile eye makeup looks. Your look is classic Audrey Hepburn, and you’re a cat-eye woman who is stylish, sophisticated and prefers a more subtle girl-next-door image! Ruling the room with a smirk, you love going by the fashion rules and being the ultimate diva.

Thick eyeliner

thick eyelinerYou are a lover of makeup and a lover of more exaggerated makeup. You’re not afraid to ramp up average eyeliner and take it up a few notches to give it the Amy Winehouse effect! You love transforming your look with colours, shapes and put a strong emphasis on your gorgeous eyes. You are the kind of person who is keen to keep a strong eye contact while chatting. You have no difficulties in refusing a down-to-earth lifestyle and instead diverge into the world of fantasy and endless possibilities!


Categories
Beauty

Brush it off

One makeup product, so many brushes! If you’re wondering what to use when, it’s time to take a short tutorial.
by Ankita Pathak

Let us just admit that the number of brushes that exist for a single makeup product can be overwhelming. And once you zone in on a specific shape, material, and brand, what exactly do you use it for? Well, that’s where we come into the picture! Read on for essential brushes that every girl should have and what they’re used for.

stipple brushThe Stipple Brush 

The flat head foundation brush, also known as the Stipple Brush, is perfect for a smooth foundation application. All you need to do is pour a little foundation on the back of your hand, dip the brush onto it and stipple it across your face. The flat head will give you an airbrushed, high-definition and even finish within seconds.

The Powder Brush

This fluffy brush is ideal for your compact and loose powders. The brush picks up less product than a normal puff and provides an even, matte finish on top of your foundation. Made with natural hair bristles, a powder brush is meant for the areas of the face that tend to shine: between your brows, around and on the tip of your nose, your upper lip and your chin. This allows the rest of your face to glow and breathe.

powder brush

eyeliner brushThe Eyeliner Brush

This flat stiff liner brush (in pic on left) is a great tool to apply liquid or gel liners in the inner and outer lash line. The stiff head makes it easier to apply the liner right next to your lashes, filling any extra gaps that your normal eyeliner brush fails to. For the cat-eye lovers, this is a must have brush as it’s a great little tool to create a precise and even line. Want to use this for more than eyeliner? Put it to use as a brow brush to fill in spots for fuller and dark brows.

The Blending Brushblending brush

As the name suggests, the blending brush can harmoniously blend shades by creating soft edges, without wiping away the colour of your eyeshadow. A windshield wiper motion with the brush can help in blending and mixing colour, just right for the smoky eye. Another use? Swap the brush to apply your concealer in areas difficult to reach.

The Angled Blush Brush

The slanted shape of the angled blush brush offers precise application for a sculpted look. With the angled side, set the brush on your cheeks to sweep on that gorgeous blush colour. Turn the brush around and use the slimmer side for contouring with a bronzer or highlighter. This brush helps in highlighting the features as it enhances the hollows of your face for a great chiselled look.

angled blush brush

(Featured image courtesy missmwah.wordpress.com)

Categories
Beauty

10 ways to glam up instantly

Want an instant sparkle to your tired eyes? Wondering how to make your gorgeous lipstick last long? Just read on.
by Ankita Pathak

They say beauty is self-confidence applied to the face. But what happens when you know how beautiful you want to look but don’t know how to achieve the look? We’ve got 10 little ways to help you glam up and stay gorgeous. Here’s what you do:

dark eyeliner– Dark eyeliner is a part of our Indian shringar. But if you’re not a professional makeup artist, it can be difficult to line your eyes with a liquid liner. So the trick is to line eyes first with a pencil liner, because it’s easier to hold the pencil than a brush. Then trace the line you just made, but this time use the liner brush. If you are good at colouring, this should be a piece of cake! Your eye liner will not only stay for long but would also be smudge-free throughout the day.

– Insomnia, stress and late-night TV watching are all giving girls puffy eyes. With eyes like these, you will find that even heavy concealer fails to have any effect. Here’s a quick fix: dab your white pencil liner in your inner eye area. It will brighten up your eyes and give them an instant sparkle!

– For gorgeous lips during the day, dab lipstick on to your fingers and then to your lips. It will give your lips a subtle color wash and leave them looking juicy!

– Whatever the season, there’s no excuse for tardy eyebrows. To keep your brows neat in between brow appointments, invest in a goodeyebrows pair of tweezers and fill in any gaps with a soft, smooth brow pencil that gives a natural finish. Don’t own a brow gel? Replace it with a clear mascara to avoid hair from looking straggly.

– Sporting no makeup and get a sudden interview call? Do this: take a lipstick and place it directly on top of the apples of your cheek. Aim a little higher and apply. Dab the same lipstick on your lips, and you’re good to go! This will not only give your cheeks a rose tint but will help make your cheekbones look even higher.

– Making lipstick last all night is a task! The key to long-wearing, transfer-proof lipstick is layering. First, apply colour directly to your lips. Next, separate a two-ply tissue and hold one sheet against your lips while dusting translucent loose powder on top. Remove the sheet and apply another layer of colour. Blot one last time with the remaining sheet and you’re good to go—for hours.

– In makeup, as in life, timing is everything. If you tend to apply concealer first, change things a bit: start with eye makeup instead. That way, you can easily clean up any powdery residue that migrates below your eyes and which could cast dark shadows, with a Q-tip soaked in makeup remover or baby oil. Then top with concealer for a bright finish.

foundation– Feel your foundation melting off by the end of the night? You will find that even the best liquid foundation won’t give you a flawless complexion unless it’s well blended. To make foundation melt into your skin, dab it on with a dampened makeup sponge – wet the sponge, then squeeze until it’s almost dry. Next, dispense foundation onto the back of your hand, press the sponge into it, and apply wherever you want coverage. It will give you an air-brushed finish which will stay fresh all day long.

– The bronzed look need not be limited only to summers. For a slimmer face, sweep some matte bronzer in a slant under your cheekbones, on the bridge and sides of the nose and jaw line. Don’t be surprised if you end up looking like a Greek goddess!

– To make your at-home manicure last long, paint the tips of your nails first after you’ve applied a base coat. Follow as usual with two coats of colour. The extra step reinforces the tips, where peeling usually starts.

Do you have an instant glam tip to share? Tell us in the comments section below.


Exit mobile version